
Congratulations if you have started your blog, and if you have not yet started one, what are you waiting for? This blog post is a compilation of vital tasks you need to complete before you decided to launch your blog. This post, coupled with my Blog Start-up Checklist, will help you understand some of the nuts and bolts of configuring and starting a new blog. Let’s get right into business!
1 I Purchase Web- Hosting and Domain Name
Purchasing web-hosting and your domain name is the first step to creating your own blog; I recommend using Plans at Bluehost start as low as $3.95/month if purchase for 36 months; that’s $142.20 or $5.95/ month, which equates to $71.40 for 12 months. The plan includes a free domain name, which is an additional cost with other hosting platforms. The signup process is easy; follow the tutorial in this blog post.
2 I Choose A Niched Niche
Decide what type of content you want to share with your audience; I can only imagine you’d want to share content on topics that you are passionate about and if you do your chances of a blogger’s burnout will be less likely if you are sharing your passion.
Be specific in your niche, so if you choose to be a photography blogger, niching down would be a landscape photography blogger. This helps your audience know what to expect from you. Some examples of niches are Photography, How To Play Chess and Breastfeeding. The next step to narrow down your niche; for example, if you chose How to Play Chess as your niche, a specific niche would be How To Teach Kids to Play Chess. Consider these pointers when trying to come up with your niche:
- Why would someone read your content?
- What benefit can your audience get from your content?
- What is the purpose of writing this content?
I also believe there is nothing wrong with exploring different content types to find what really works for you, especially in the early phases of your blogging career. It might be harder to get a dedicated audience since you would not be writing about one specific topic.
3 I Brand Identity
It is recommended to design a brand kit for your business, and rightly so. Your brand is your voice, style, and identity; it’s what your audience will use to recognize you, your products, and content. When creating your brand, you will need a Logo, Color Palette, Fonts, and Pattern. All this can run you over $300.00 or more you choose to use a professional graphic designer. You can hire a designer from Upwork or Fiverr or purchase premade designs from Creative Market or Etsy for cheaper options. One main disadvantage of purchasing a template is that your design will not be exclusively yours.
I recommend creating your own branding if you have the expertise to do so. There are many ideas on Pinterest for logo designs, color palette, fonts, and patterns. There are several free fonts options from Font Squirrel or Google just be sure to choose only fonts with commercial licenses. You can choose up to four fonts for your brand; one of the challenges I have personally experienced with this is you sometimes run into font disharmony. I mostly see this when creating Pinterest pins. One way to overcome this is by selecting one font with different typefaces. Some typefaces of Arial font are Regular, Narrow, Bold, and Italics. So even though you selected just one font, you can use it for different purposes (Headline, subheadings, and body texts) by changing its typeface.
If you decide to create your own brand kit (logo, font, color palette, and pattern), you can get this done with Canva Pro, Photoshop, or Affinity Photo. Canva is the most user-friendly and is foolproof, but you will get much better results with Photoshop or Affinity Photo. However, Canva is certainly working to deliver quality in this software. Canva Pro is a true all-rounder for any business. Create your branding kit and store it for easy access in Canva Pro; use premade templates for social media posts and Pinterest pins. The built-in content planner gives you the option to schedule pins to be pinned at a later date. While it’s not as intuitive as Tailwind, it has its place, and I love that most of my tools are in one location.
If you are savvy with technology or you do not a creative eye, one of the easiest logos to create is a text logo, which can be used alone or in combination with a graphic element. I recommend doing some research on creating branding kits, get ideas from Pinterest, and big companies before getting started. While your image is important and having a brand image will encourage your audience to take you seriously, start with a self-designed brand (brand kit) in the early stages and when you have your content type, the target audience nailed down you can rebrand and splurge on professional branding. Rebranding may also work in your favor as it can:
- Attract new audiences to your brand, which will drive more traffic to your blog.
- It will get your business up to date with current trends.
- Shows your business is evolving by reflecting new goals, products, offers, and values.
- Increase profits by helping you stand out from your competitors.
4 I Choose A Mobile- Responsive Theme
After you have purchased your domain name through Bluehost, the next step is to design your website using a theme and not just any website, a mobile-responsive website. Luckily, WordPress has several free mobile- responsive theme for different types of websites. These days, most traffic to websites comes from mobile devices simply because more people are on mobile devices than tablets and desktop computers. So you can see how you would be at a disadvantage if your website is not mobile responsive. Here are three top-rated free mobile responsive themes available on WordPress for different purposes.
- Astra is one of the most popular themes and is simple to use. Use the Astra theme with page builders like Brizy, Divi, and Elementor, all of which can build custom websites. I use Brizy here on my website to build out my resource library; it is lightweight and easy to use and creates anything from landing pages, popups, and contact forms. It also integrates with email marketing platforms like Convert Kit, Mail Chimp, Mailerlite and Active Campaign.
- The Shopisle theme will help you design a modern online shop to sell your products and is compatible with Woocommerce. Woocommerce is an open-source eCommerce platform available as a plugin in WordPress.
- Hestia theme is a great option to create a website for businesses.
5 I Pillar Posts
What are pillar posts? Pillar posts are valuable, rich content that gives your audience actionable steps. The good news is Google loves valuable content. Pillar posts are the foundation of your blog, with posts having an average of 1500- 2000 words. When creating pillar posts, aim for evergreen content; that will be relevant outside of trends and will continuously drive traffic to your website. Some common pillar posts format include how-to tutorials, list posts, checklist, cheat sheets, reviews, or interviews.
6 I WordPress Plugins
One of the benefits of having your website hosted on WordPress.org is the freedom to customize your website with plugins from the WordPress repository. There are several free plugins that can help you make modifications to your website without having to mess around with codes. However, do not get overzealous with installing plugins as too many as well as heavyweight plugins can start slowing down your website. Here are a few free and paid good plugins to install on your website from the start, these are mandatory.
- All In One SEO Pack or Yoast SEO, both these plugins have a free and premium version. SEO Optimization can take some time to master if ever; in the meantime, these plugins can give you a start. All In One SEO Pack is the most beginner-friendly and is what I recommend starting with. Yes, it is not as colorful as Yoast, but it is a lot easier to configure. However, if you decide to install Yoast, several tutorials on YouTube walk you through the setup process step by step.
- CleanTalk is a premium cloud- base spam filtering plugin that protects your website from spam. This includes protection for your contact forms, and comment boxes, and from spam users or bots. This plugin is $8.00/ year and is what I use.
- UpdraftPlus is a free plugin that backup your website in the cloud using services such as Dropbox, Google Drive, or Amazon S3. It is so important to have a backup service in place if your website gets hacked, crashes during a plugin update, or your hosting server crashes. Without a reliable backup service in place, you will lose all your hard work and investment. Bluehost includes in their Choice Plus one-year free website back up, and in the Pro plan, it’s included for free. I have been using the Choice Plus plan since signup with Bluehost, and they have had to recover my website and have done so quite efficiently. Their customer service is one of the best out there.
7 I Email Marketing
There is a push to start an email list as soon as you have launched your blog and rightly so. Your email list is the gateway to a profitable website, with your email list you can do content marketing, sales funnels, product launch, and promotion, and interpret analytics. There is money in the list, as the saying goes and I still believe this to be true.
Blogging can be a lot of work when you think about sending out emails and responding to email and writing blog posts but here is a small suggestion that can get you started. Create a great product for an opt-in freebie like a checklist, an ebook, etc. Follow that with an email sequence introducing yourself to your audience and explain your WHY for wanting to share your content with them.
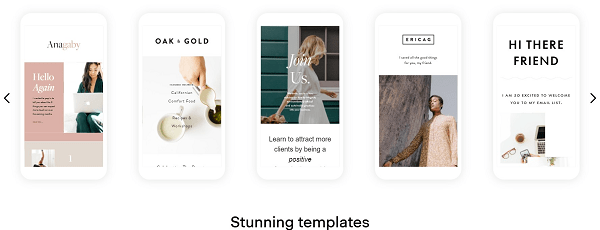
I recommend Flodesk for this, aside from their budget-friendly cost of only $38/ month or $19/ month (a 50% discount and, a lifetime rate if you use my affiliate link) and this cost remains unchanged regardless of the number of subscribers on your list. They have beautiful premade email templates for welcome sequences, course sale announcements, newsletters, welcome new subscribers, and more that will get you off to the right start. All templates are customizable allowing you to add personal branding and social media handles. They are in the Beta phase and have been adding new updates for a more pleasant user experience. Learn how to set create opt-ins in Flodesk with this tutorial.
8 I Create A Pinterest Business Account
There is a good chance Pinterest will be your number one source of traffic to your website, but the only way to benefit from Pinterest is by setting up a business account.
How to add a business account to your personal Pinterest account:
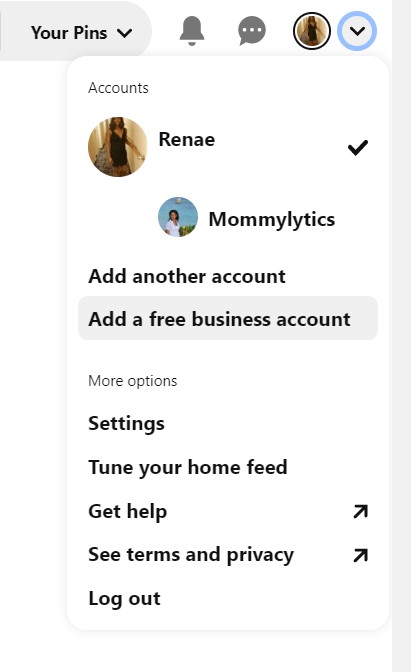
> Log into your personal Pinterest account click the down arrow in the top right corner of your menu
> Click add a free business account, then follow the prompts
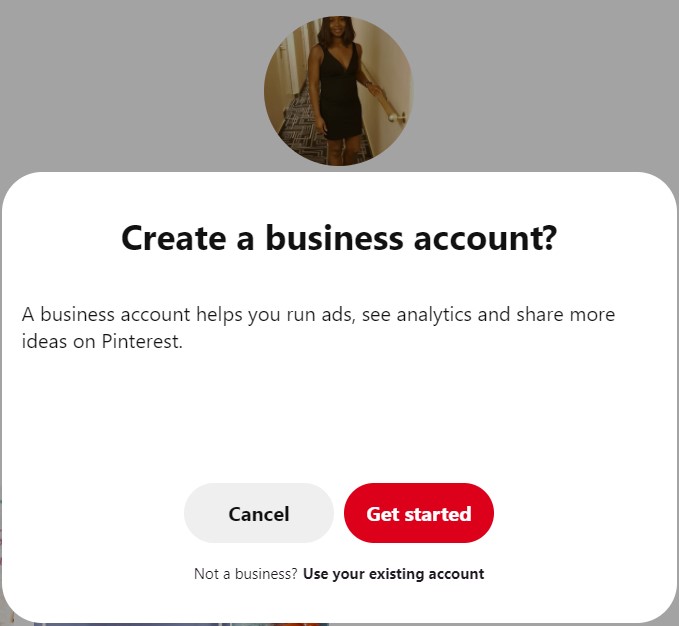
> Add profile picture, business name, website address
> Select country/ Region and language, then click next
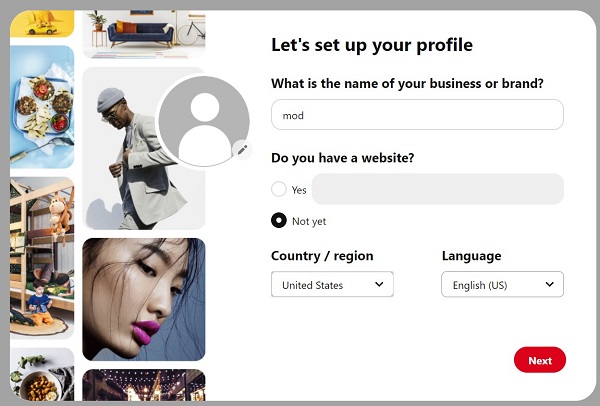
> Select one of the options from the drop-down menus for the focus of your business, then click next
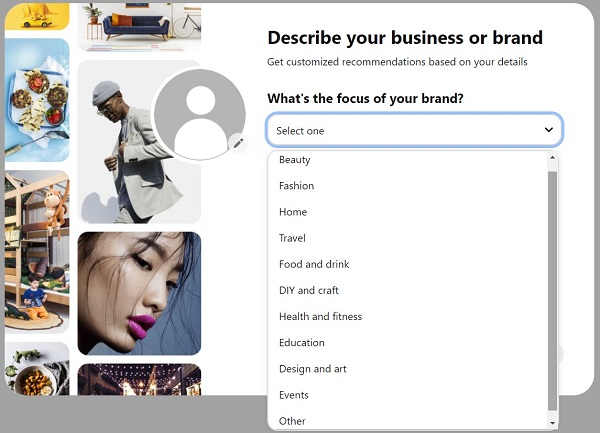
> Select what type of business you are then click next

> Select yes or no, if you don’t want to run ads. If you are undecided, click I’m not sure then click next
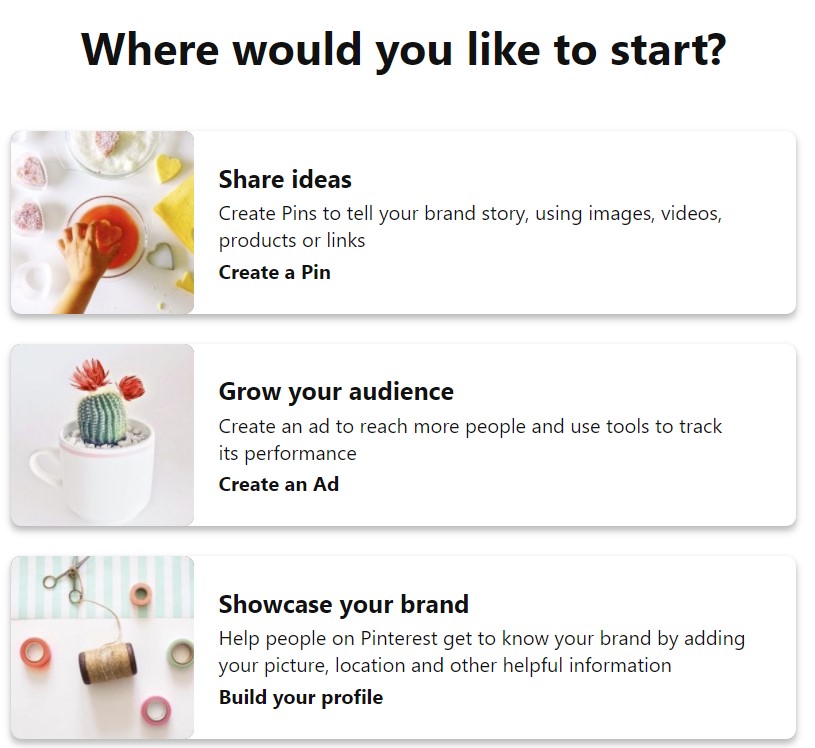
> Select one option to start, create your pins, grow your audience, or showcase your brand, and just like that, you can start creating pins.
Tools for creating Pins
Canva Pro is an amazing tool for creating your Pinterest pins; it is completely beginner-friendly with everything in one location; stock photos, premade pin templates, editor, and content planner/ scheduler. I recommend creating at least three pins for every blog post you publish. This does take a bit of time; at least I find it does; however, the easiest way I have achieved this is by using Canva. Canva is an absolute lifesaver.
When creating pins, include in your pin description keywords and hashtags related to your post and include a destination link. Create pins at a 2:3 ratio example, 1000: 1500 pixels, and easily read text overlay.
This is a list of eight things to when starting your website; these will get you off to a good start and help you set a foundation for success. If you found this content, help share it on your favorite social media page and sign up for my Blog Startup Checklist
Leave a comment in the comment section on topics you would like me to cover.
Cheers!




Leave a Reply